Deep Map™ Rules
If you look at the custom.mapRule file we added in the previous tutorial (see Deep Map™ Styling), you will notice there are some existing rule definitions. Rules can be used to dynamically change the styling of a map. The specifications for the rules can be found in the Documentation section under “Deep Map™ Rule specification”. A rule definition adheres to the following structure:
rule <ruleName>(<featureTypeName>) ["<rule statement>"] {
 <rule body>
}
<ruleName> is a free identifier for the rule. <featureTypeName>
is the name of the style-feature to which the rules should be applied.
The <rule statement> is an SQL-like statement mimicking the “where”
clause. As long as the statement is true, the rule is applied to the
featureType. The <rule body> defines which changes should be made to
<featureTypeName>. Rules can also be nested. This means it is
possible to add another rule to a different featureType in
<rule body>. We will soon see how this could be used. The only
limitation is that the nested rules featuretype may not be related by a
child-parent relationship to the exterior featuretype.
In the tutorials for iOS or Android, a tap-handler was implemented to select objects. The reason why the selected objects change their color is due to the rules in the rule-file. We have a total of five rules, one for each of the following featuretypes: “stand_manual”, “osm.building”, “building”, “stand_tables” and “stand_rooms”. The rule statement is always the same: “isSelected()”, so if an object with one of the aforementioned featuretypes is selected, the fill-color #ff5511 is applied to it.
It can be cumbersome to create one rule for each featuretype. It would be optimal if we could group similar objects together, and define one behavior for the whole group. This can be done in two ways: adding multiple targets to one rule and featuretype inheritance.
The Multiple Targets Approach:
It is possible to add multiple targets to a single rule. To do this, add all featuretype names to the rule (separated by commas). This way, the five rules in the custom.mapRule file could be combined in a single rule:
rule selectionRule(building, osm.building, stand_rooms, stand_manual, stand_tables) [" isSelected() "] {
        fill-color: #ff5511;
}
This approach should be used if a rule is applied to many targets that have no relation to each other. For example, “building” and “stand_tables” may behave very differently in the map, but both should be selectable. It is also more robust against user-errors than the following featuretype inheritance approach. When in doubt, use multiple targets.
The Featuretype Inheritance Approach:
Another way to apply a single rule to multiple targets is by grouping different featuretypes. This can be done with featuretype inheritance. Each feature-style definition consists of two parts: the featuretype name and a parent-featuretype name. The child style inherits all properties set by the parent - rules included! In order to group all selectable polygons together, we must define a new, imaginary featuretype called “selectable_polygon” right behind the polygon feature definition in the custom.mapStyle file:
feature polygon {
        //...
}

feature selectable_polygon : polygon {
}
A feature named “selectable_polygon” does not actually exist in the map, and since we only use it to group other featuretypes, we also do not need to set any properties. Featuretypes can now be assigned to each group by simply inheriting from it.
feature building:selectable_polygon {
...
}

feature osm.building:selectable_polygon {
...
}

feature stand_rooms:selectable_polygon {
...
}

feature stand_manual:selectable_polygon {
...
}

feature stand_tables:selectable_polygon {
...
}
We only have to create one rule with “selectable_polygon” as the target:
rule selectionRule(selectable_polygon) [" isSelected() "] {
        fill-color: #ff5511;
}
Rule inheritance should be used if multiple featuretypes always share the same behaviour. However, some care has to be taken if nested rules are used, since the inheritance may cause unpredictable behaviour when it is not applied correctly.
Rule-Nesting
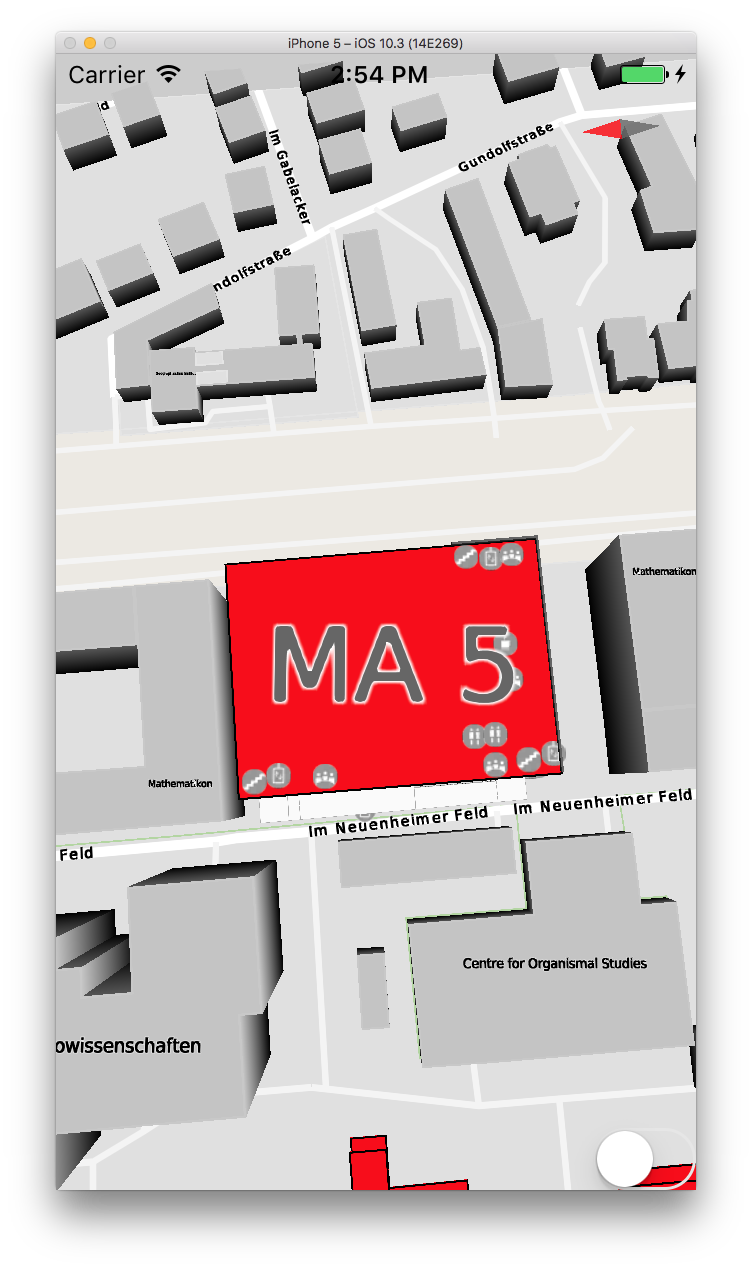
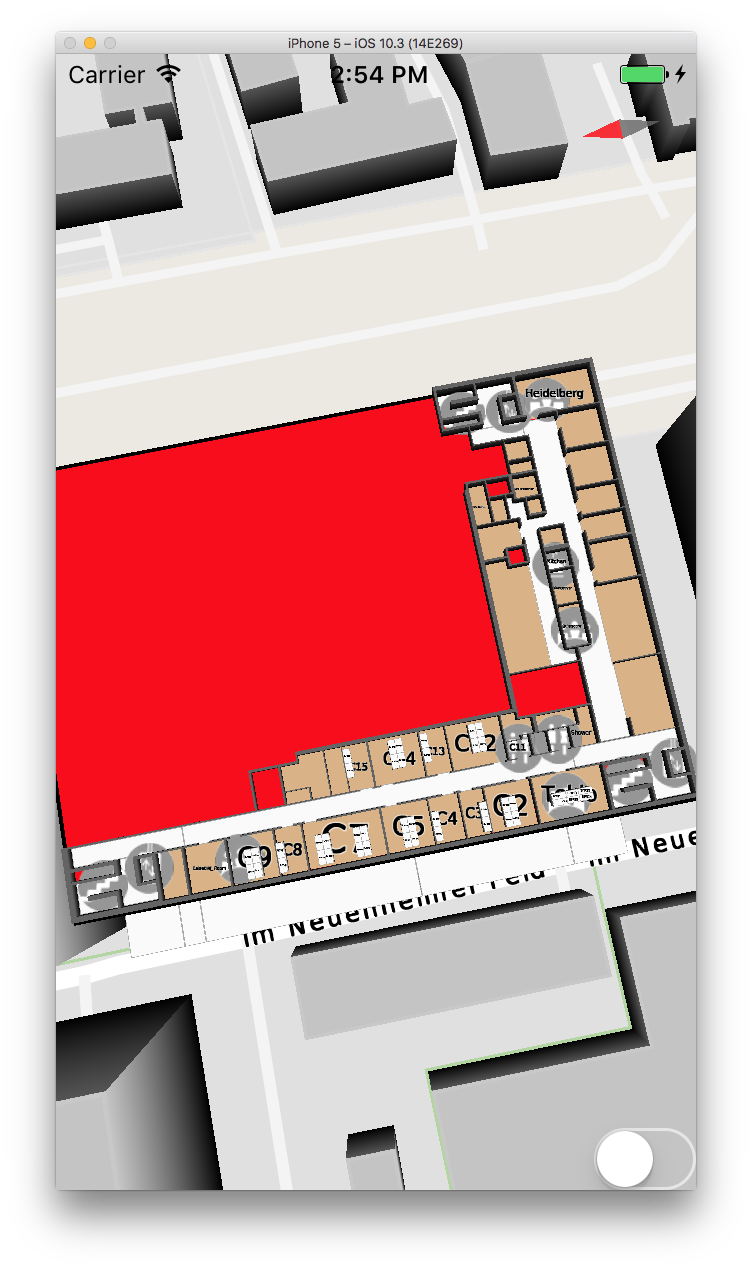
Take a look at the building with the label “MA 5”. You will notice that the building has some rooms and tables inside it. However, if we are far away, the rooms and tables are barely recognizable and distracting. On the other side, if we get close to the building, the label of the building becomes annoying, because we want to focus on the rooms. Ideally, everything inside the building will be hidden if the camera is far away, and the label of the building will be hidden when the camera is zoomed in. This can be done with rule-nesting. First, we must create two new featuretypes in the custom.mapStyle file, which inherit from “selectable_polygon”:
feature selectable_polygon : polygon {
}

feature building_type : selectable_polygon {
        text-visibility: none;
}

feature building_interior_type : selectable_polygon {
}
Then we regroup our five featuretypes into the two new groups:
feature building:building_type {
...
}

feature osm.building:building_type {
...
}

feature stand_rooms:building_interior_type {
...
}

feature stand_manual:building_interior_type {
...
}

feature stand_tables:building_interior_type {
...
}
Now we have two groups of selectable_polygons: the building_type group, which have invisible labels, and a building_interior_type group of rooms and tables, which are fully visible. What we now have to do is create rules that make the labels of the building_types visible when the camera is further than 200m away, and make the building_interior_types invisible at the same time. This can be done by nesting two rules like this:
rule buildingDistance(building_type) ["distance() > 200"]
{
        text-visiblity: visible;
        rule interiorVisibility(building_interior_type, fg_polygons, fg_walls)
        {
                visiblity: none;
                text-visiblity: none;
        }
}
The rule combines two rules: The exterior rule is applied to all objects in the “building_type” group. As soon as an object is further than 200m away, the rule is applied and the text-visibilty is set to “true”, so the labels of the buildings are displayed if the camera is far away. The nested rule is applied to all objects of the “building_interior_type” group which are children of the exterior object. Note that the nested rule has two additional targets: fg_polygons and fg_walls. Those types may also appear within a building, so we add them too. However, since they should not be selectable, we cannot let them inherit from building_interior_type, so we add them as additional targets. The inner rule will only be executed if the exterior rule is applied. The missing rule statement means that the rule will always be applied, so we get our desired behavior: